The Reason
The Golden Bridge was first launched in 1980. It remains an iconic example of Corum's collection.
Functions
Automatic winding with a linear oscillating weight made in platinum. Hour and minutes hands centrally positioned on the in-line movement.
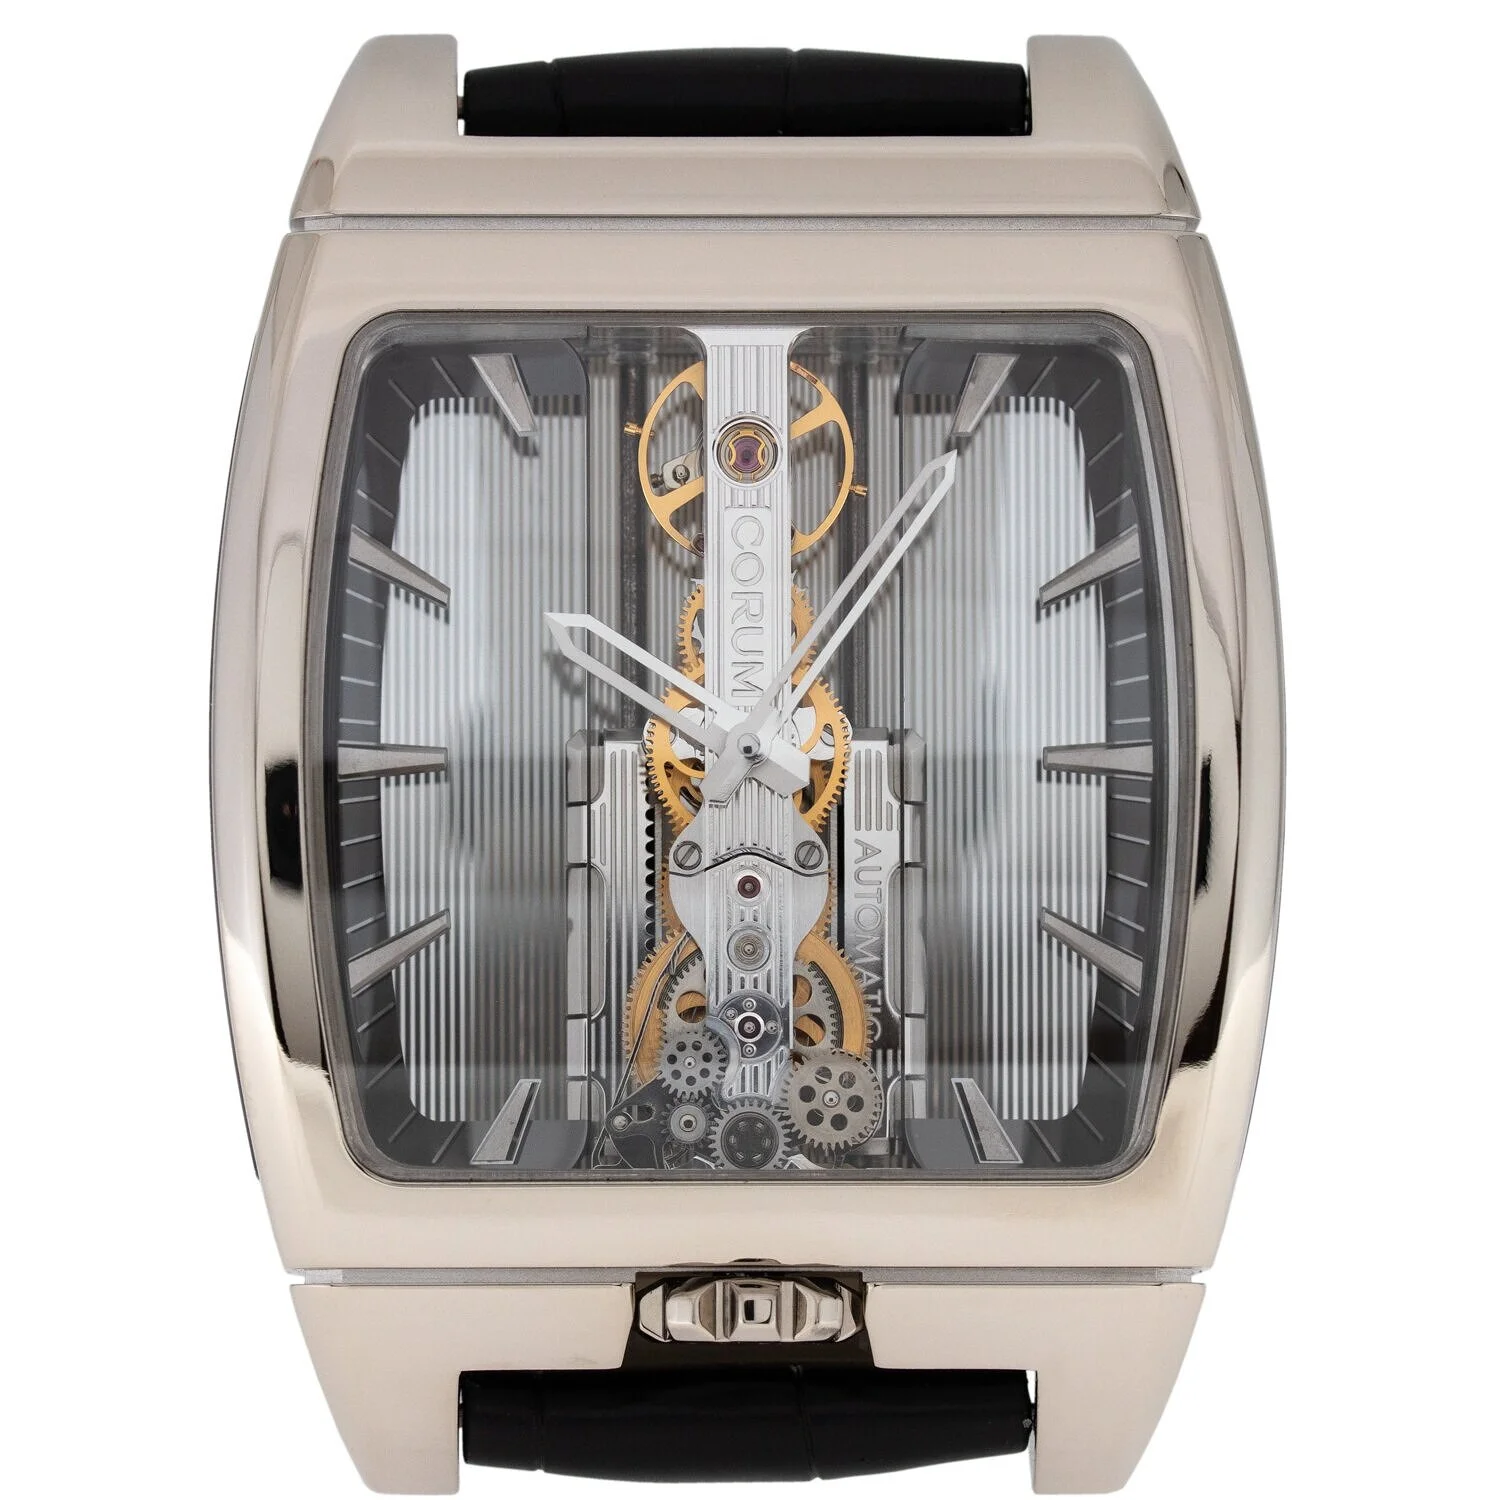


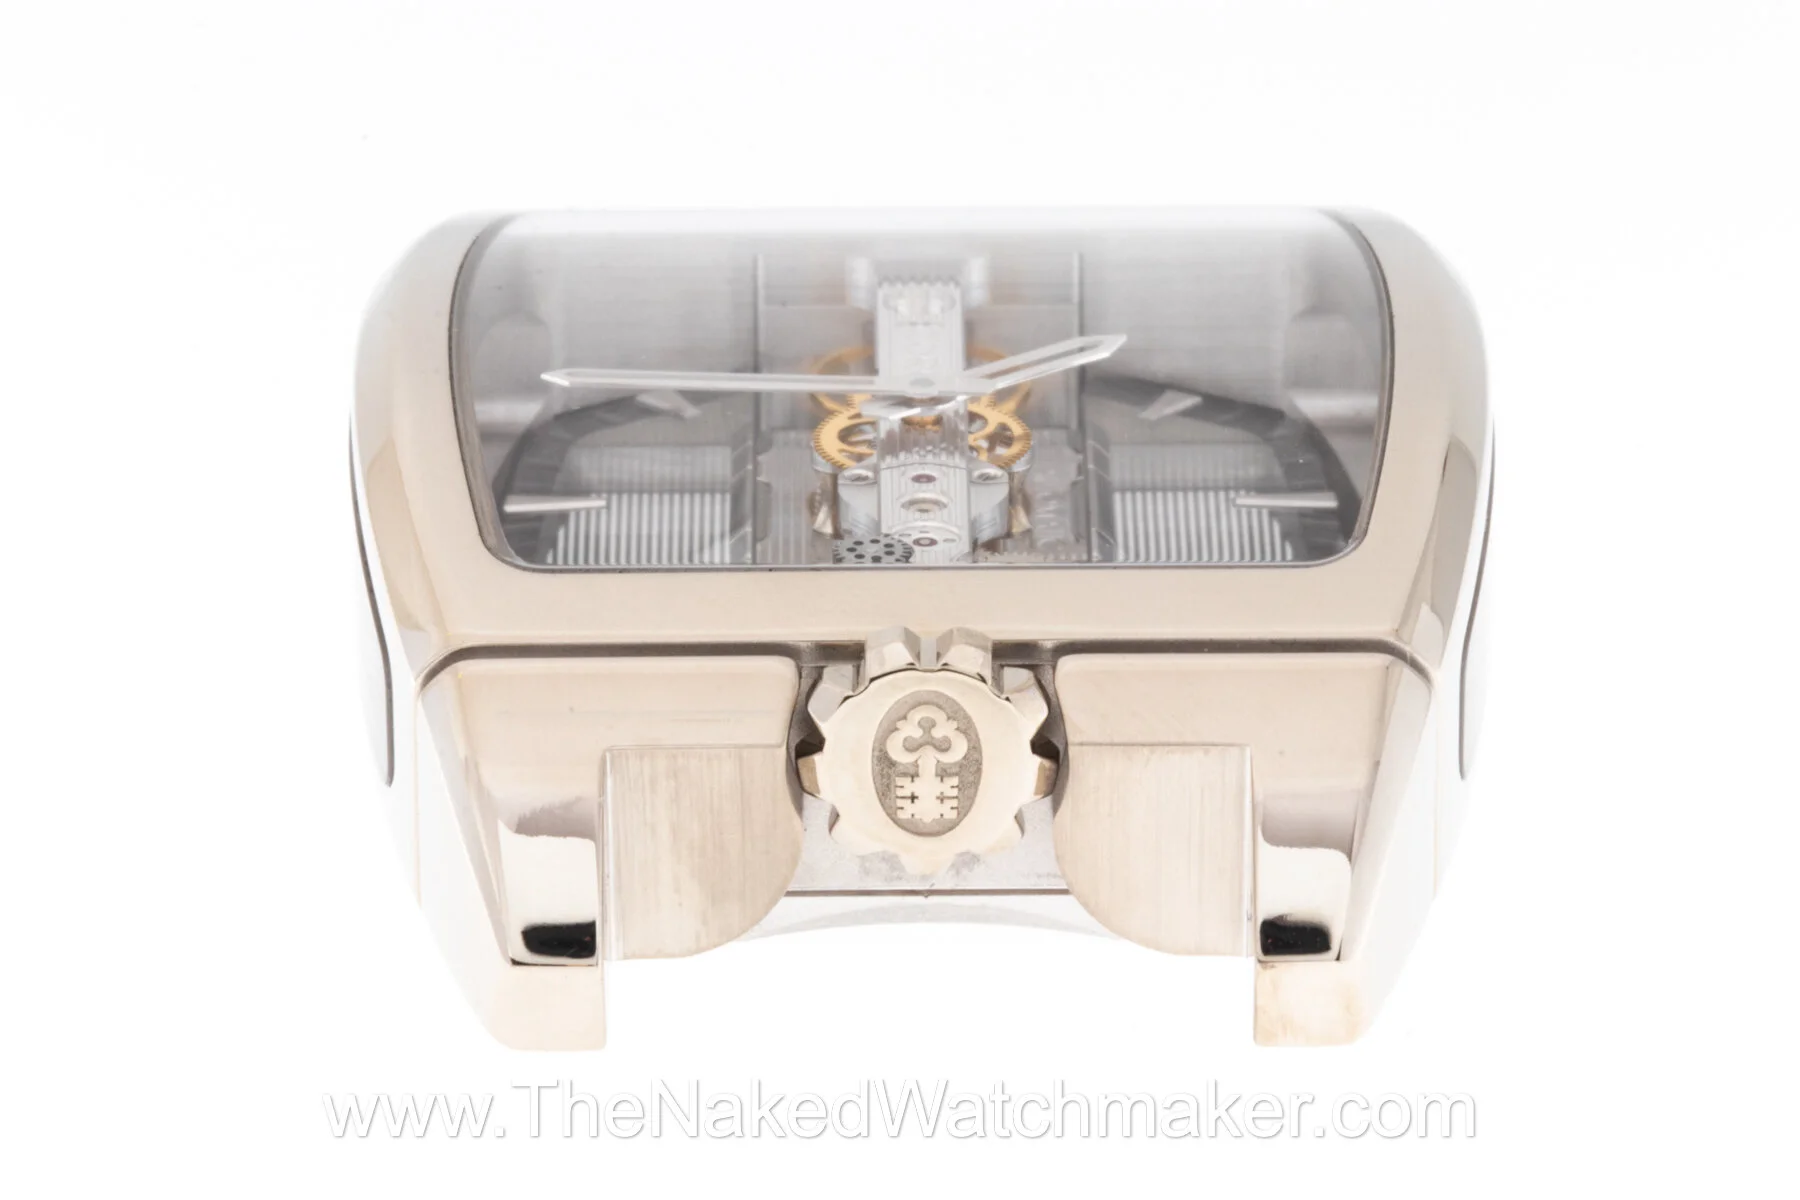
The watch is wound and set through the winding crown set at 6 o’clock between the shoulders on the case
Technical Specifications
Case Material white gold. Case dimensions 37.20 mm x 51.80 mm, thickness 13.70mm. Sapphire glasses with anti-reflective coating. Water resistant to 30 meters.
Corum Caliber C0313. Platinum rotor weight. 18k gold bridges. 40 hour power reserve. 194 components. Dimensions 33 mm x 12.55 mm x 8.50 mm. Frequency 4Hz (28,800 Vph).

The sapphires set into the side of the case both allow visibility to view the side architecture of the movement, as well as light in, that accentuates the architecture when the watch is viewed from the front sapphire.


The automatic version of the Golden Bridge was launched in 2011.

The case back is held onto the case by a friction fit created by a rubber seal and then locked in place by 4 gold screws.

The rubber seal sits laterally in a milled out section around the case back. Designed in such away due to the tonneau case shape.

The case back removed showing how the movement and dial sapphires are held in place.

The winding crown released in order to remove the movement from the case.

The silicon shock absorber rings shown below cushion the impact of the platinum rotor weight as it hits the blocks at the end of the rails, when the watch is worn.


The two rails that guide the linear rotor weight are held in place by end plates secured with two screws.

One of the plates has been removed and is sitting on the rails. The rails are coated with a teflon layer to ensure the rotor slides easily.
The rotor and rail assembly removed.

Screwed onto the platinum rotor weight are two steel plates. The top one shown below is made in the form of a rack and drives a pinion on the movement, winding the mainspring.


The Pt950 is the official platinum stamp.
The assembly of the movement in the case is layered. After the plates that hold the rotor rails in place are removed, the spacer they sit on is accessed and another two screws holding this piece are removed to free it.

The spacer’s are made from 18k gold.
The next layer to be removed holds in place the automatic gear train.

Each layered section of the bridge is made in 18k gold.
The steel wheel/pinion in the centre is driven by the rack on the rotor weight.

The automatic train bridge with the end spacer. The two hardened steel rails sit into the ends of these two pieces.

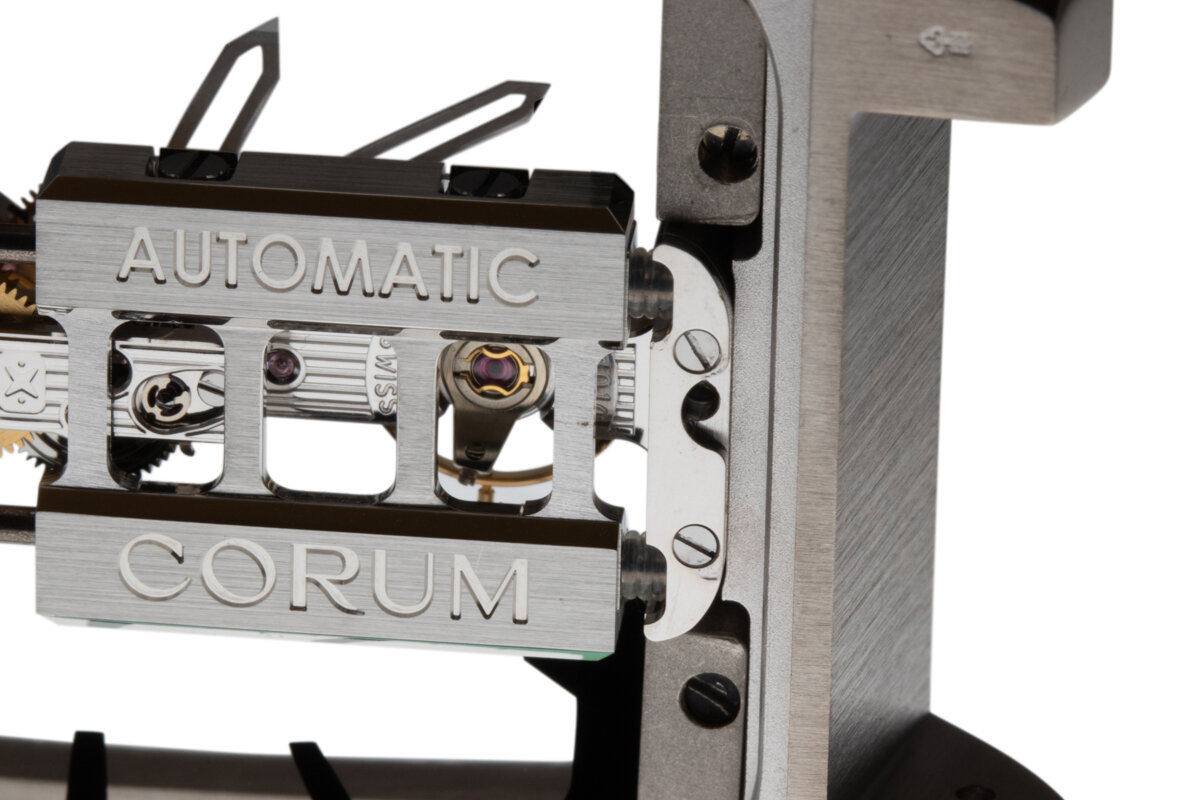
Part of the automatic winding train. The steel assembly includes a ceramic ball race and a reverser system that blocks in one direction driving the train but is free when the rotor weight slides in the opposite direction.

One of the blocks freed that holds in place a side sapphire dial.


The two silicon cushions lay either size of the sapphire dial panels holding them in place safely.
One of the side dial panels removed.

Both side dial panels and the winding crown removed.

The inclined, milled out sections of the case support the sapphire dial panels, the silicon cushions hold them in place and the small pillar (above the cushion) locates the position of the panel.

The movement removed from the case.
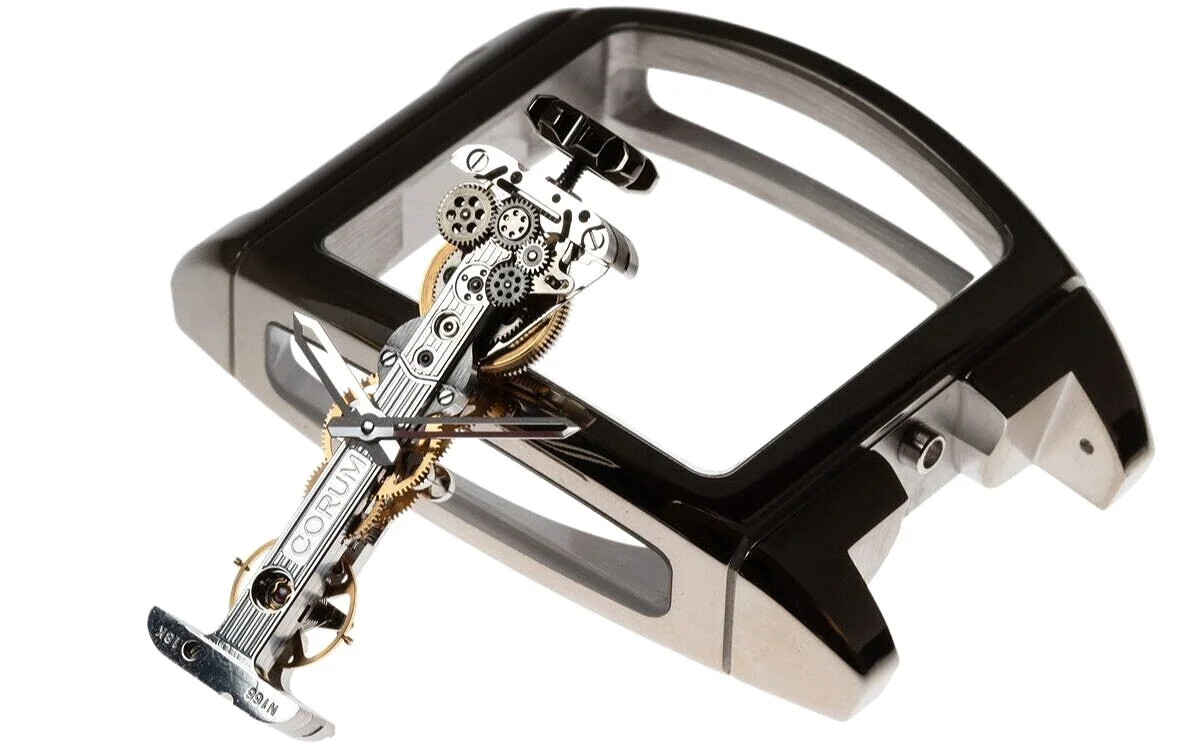
The primary white gold case components.

The more holes that are in a case the harder it is to ensure water resistance, to add additional complexity to this process all sapphires are unusual shapes.
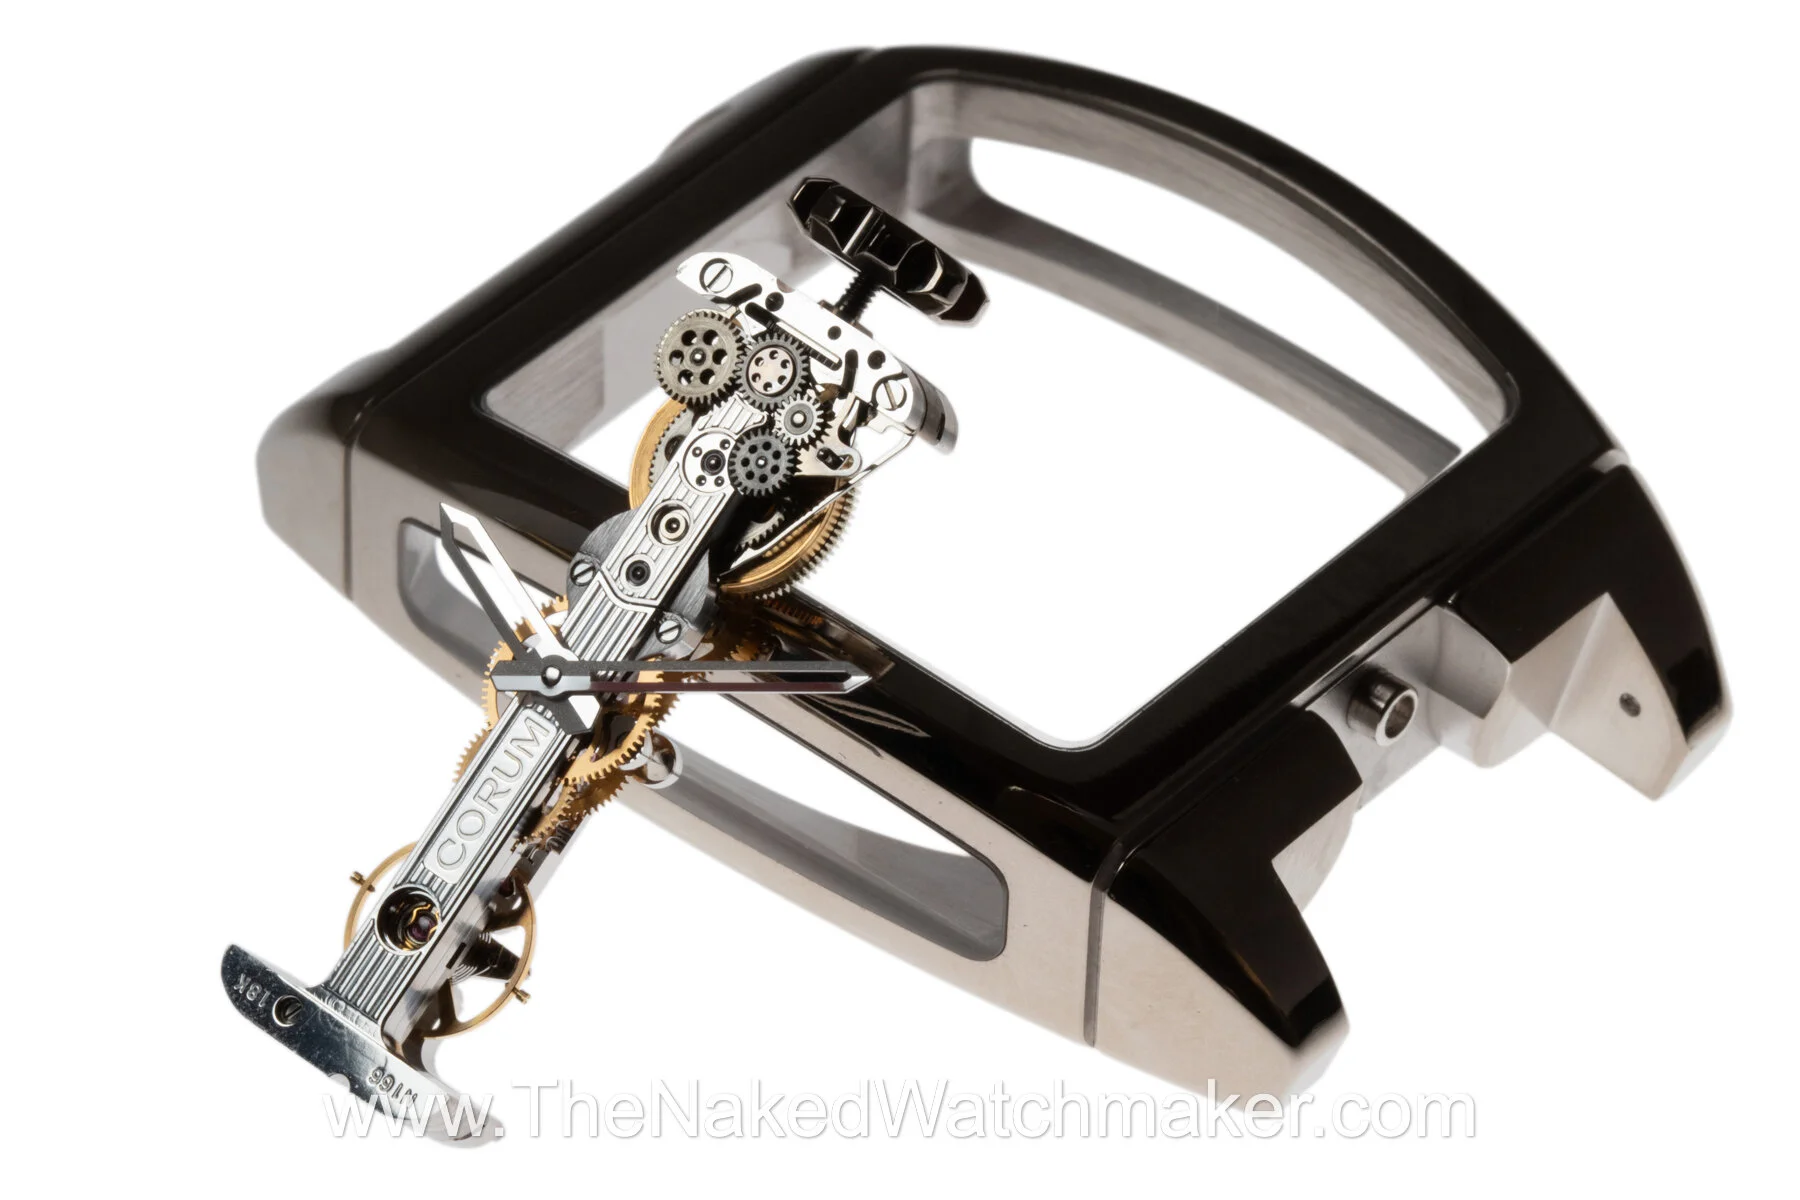
The movement. At the end of the movement to the left, you can see 4 layers of bridges and plates that contribute to the architecture of the calibre, when assembled in the case there is a fifth layer, that was removed to free the movement from the case.

The linear engraving on the central bridge associates to the grill aesthetics on the case back (visa-versa).
Side view of the movement, showing the barrel, going train and balance wheel.

The movement is screwed together from the ends, as well as reinforced in the centre with the use of pillars. The pillars are cut into a concave shape to allow additional space for the train wheels that pass closely to them.

When the watch is assembled the Swiss anchor and its cock are completely hidden from view.
The hands are made from brass, machined, polished and rhodium plated.

Recto-verso of the movement with the hands removed.


A close up of the balance wheel that is free-sprung (no index for regulation). The timing is altered by adjusting the position of the screws on the side of the balance wheel.

For ease of manipulating the movement the stem is returned to its home. Below the stem are the manual winding gears.

The upper bridge with the brand name removed that holds in place the motion work which drives and carries the hands.

The upper movement bridge removed showing all of the going train wheels, escapement and balance wheels.

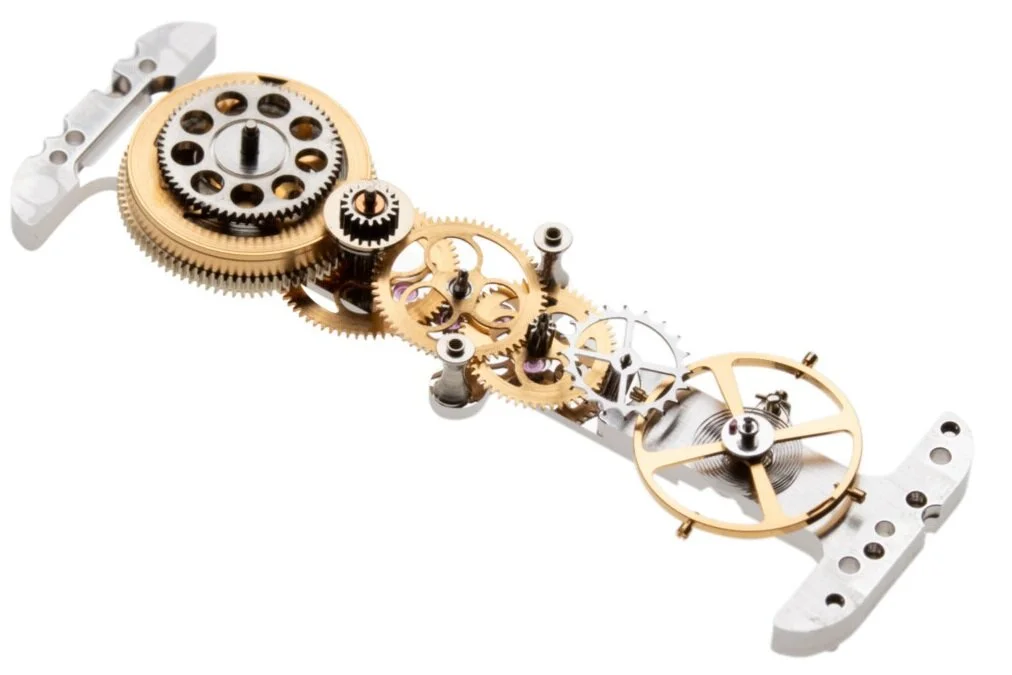
To the left, the large brass assembly is the barrel with mainspring inside which in turn drives the going train below it.

Close up of the balance wheel and its 4 regulating screws.

The Swiss anchor normally hidden, in view.

The setting gears hidden under the barrel.

The long lever/spring at the bottom is the click for the ratchet wheel on the barrel.
The main-plate with all wheels removed except the barrel.

Despite appearing to be a simple timepiece at first glance when assembled, the construction in order to execute the linear architecture results in a far more complex movement than found on conventional automatics.

The exploded movement


Summary
The Golden Bridge is one of the watches Corum are best known for, and this particular model with automatic the most complex movement in the series (2021). Although initially simple as a concept to align the gears, escapement and balance wheel the execution is not a simple task. The winding and automatic system is specifically made for the calibre and to ensure the barrel is wound effectively the system is over-engineered to optimise the movement of the wrist to wind the barrel. Assembling and adjusting the movement is also complex since parts of the escapement are hidden from site, and the majority of wheels are held under a single bridge.
Apart from a distinctive calibre resulting from the linear of design the movement, the design of the case with the cutout windows in the sides allowing light and visibility was ahead of its time.
Executing the bridge components in a precious metal which results in the Golden Bridge model name, adds additional complexity to the design. The bridge is small and volume and long in comparison to its width. The use of central pillars and reinforcing the strength of the movement through solidly attaching it to the inner case is a logical but well-executed construction.

GALLERY
In the grid below are both images used in the description of this page plus more. Please click on the image to enlarge and see in full.


To learn more about Corum